This article is more than two years old, the content may be outdated
Pre-installation
One of the dependencies that telescope requires is "moontoast/math" which in fact requires a php extension called "bcmath":
This php extension is easily installable on Ubuntu by just running:
sudo apt install php-bcmath
Once you have that extension installed, you are ready to require via composer the Telescope package by running in your project's root:
composer require laravel/telescope --dev
Configuration
Now you will have available new artisan commands:
telescope
  telescope:clear      Clear all entries from Telescope
  telescope:install    Install all of the Telescope resources
  telescope:prune      Prune stale entries from the Telescope database
  telescope:publish    Publish all of the Telescope resources
We need to run telescope:install which it will write into the configuration folder of your project a new file called telescope.php
Security
Laravel Telescope provides a lot of information of your application which you do not want anyone to see, so you'll have to secure the installation.
By default, after installing telescope it will be accesible in every environment. And we want it just on the local environment. Therefore, we head to config/app.php and remove the line with the TelescopeServiceProvider from the providers array.
And now register it in the app/Providers/AppServiceProvider.php file:
This will detect your environment on the application booting process and register the Telescope Service Provider a.k.a make telescope available only on your local environment.
Database connection
This is the key of this tutorial. In order to separate laravel's telescope information from our main database we need to create a new one
First
Open your sql interpreter and create a new database running the next sql query:
create database laravel_telescope;
Second
Open your config/database.php and head to the connections array, copy the entire mysql connection (if you are using mysql if not copy the connection information of your database), append the copied information at the end of the connections array, then change all of the constants that start with DB_ and change them to TELESCOPEDB looking like this:
Third
Go to your .env file and add the new constants:
TELESCOPE_DB_CONNECTION=telescope
TELESCOPE_DB_HOST=127.0.0.1
TELESCOPE_DB_PORT=3306
TELESCOPE_DB_DATABASE=myproject_telescope
TELESCOPE_DB_USERNAME=secret
TELESCOPE_DB_PASSWORD=secret
Psst! Don't forget to change the credentials above according to your project's needs, we all know you have copied these :)
Fourth
Go to config/telescope.php and change the line where it says:
for:
Final step! Yay!
Now head to the terminal again and run php artisan migrate
If you see these lines:
Migrating: 2018_08_08_100000_create_telescope_entries_table
Migrated:  2018_08_08_100000_create_telescope_entries_table
Everything is looking in the right direction.
Give your information Laravel!
Now, go to your browser of liking and write in that pretty url bar the domain with the /telescope path. For instance if my project is running under https://myawesomeproject.test then you'll head to https://myawesomeproject.test/telescope
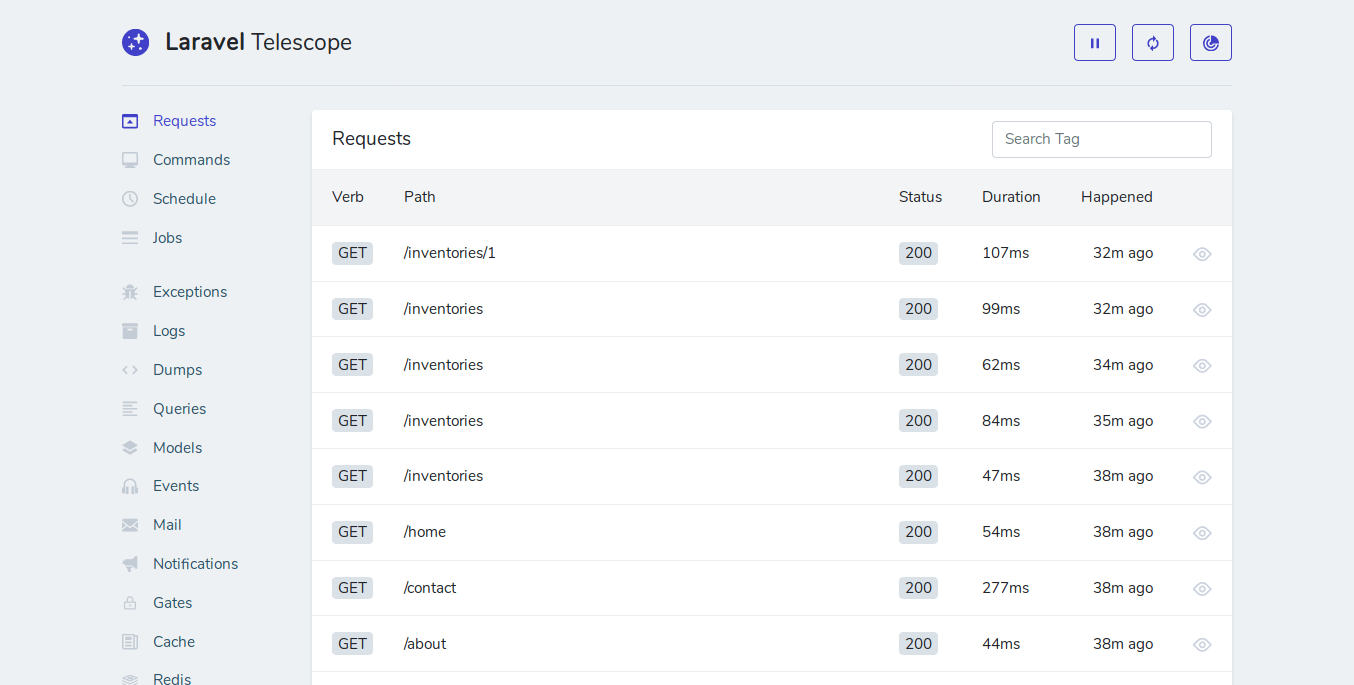
If you see something like this

You have finished the installation, now make good use of the information telescope provides to enhance your programming productivity!
Update
Testing environment
If you are going to run phpunit after you've install Laravel Telescope this way, you'll notice there will be some errors thrown, that's because we keep using the same connection for the database and when we try to make use of the trait RefreshDatabase it will try to migrate also Telescope's migrations.
In order to disable laravel telescope migrations in your tests head to tests/CreatesApplication.php and change the createApplication() method like this:
Notice the Telescope::ignoreMigrations(); line is right before bootstraping your application!